Restoring Tanzer # 32 "Elusive"


This page will chronicle the ongoing 2011 restoration of, "Elusive" (Tanzer 26, Sail #32).

There's something about taking a classic and breathing life back into it. The planning, the labor, the hours toiled over both...
I purchased "Elusive", a 26 foot Tanzer built in 1975 last year (2010). Being sail number 32, this was one of the earlier T26's they built. I don't know much of her history, except for the name that I obtained through this website on the main owners list. Even then, I can't be sure that's the correct name. The previous owner had purchased it at auction 4 to 6 years prior to me purchasing it, and the previous owner did little if any work to it. How long this boat sat prior to auction, I can't be sure. As you can see from the photos, she's in rough shape. I'm thinking of this venture not so much a restoration, more as it is a resurrection. We're going to bring this boat back to life over the next few years, and I'll keep track of what I'm doing to her here. If you have any suggestions or questions, please feel free to email me at: painthappy@gmail.com
Restoring the Weathered Handrails
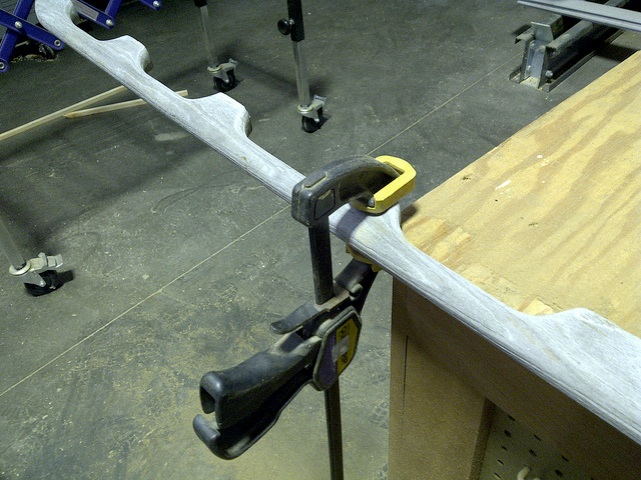
It's amazing what a little elbow grease can accomplish. In all honesty, I actually priced out some new teak handrails thinking that these were junk. The pictures of the before photos, just don't do it justice on how bad these were. Very weathered, with deep grooves, and probably neglected for 10 years or so. I decided I would try (but mostly after I got the quote on new teak. Wow.) I clamped these down on a bench and used an orbital sander with 160 grit sand paper. The sand paper is far too fine to be doing it by hand but with a power sander, it didn't take long and left behind a very nice smooth feel. All in all, it took me 2 full hours of sanding with the power sander, which includes the hand sanding that needed to be done on the underside grooves.
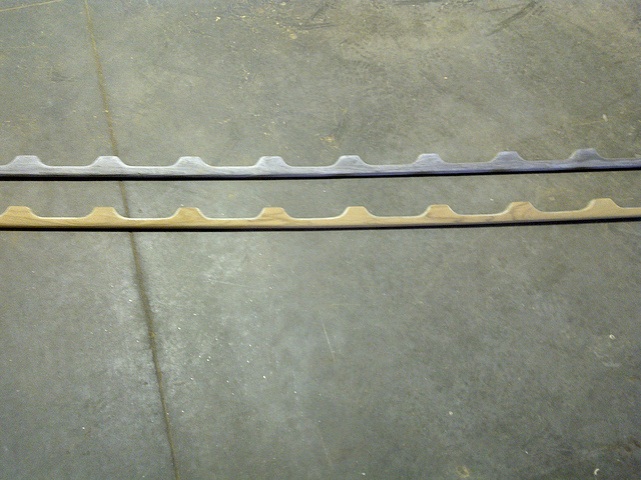
Here is a quick comparison of the hand rails, the top one untouched, the bottom one sanded (not yet hand sanded though). What a difference already.
And now here they are with 3 coats of teak oil...

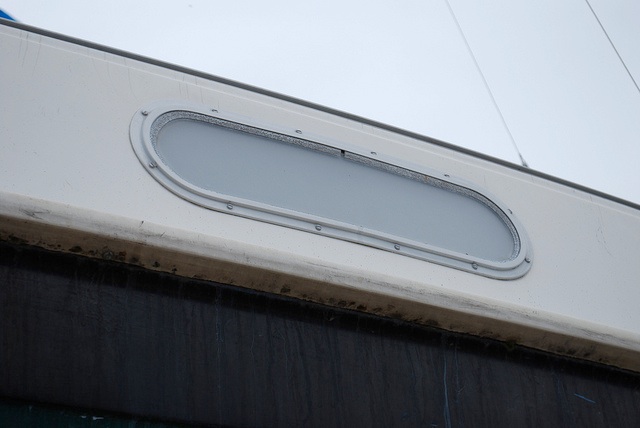
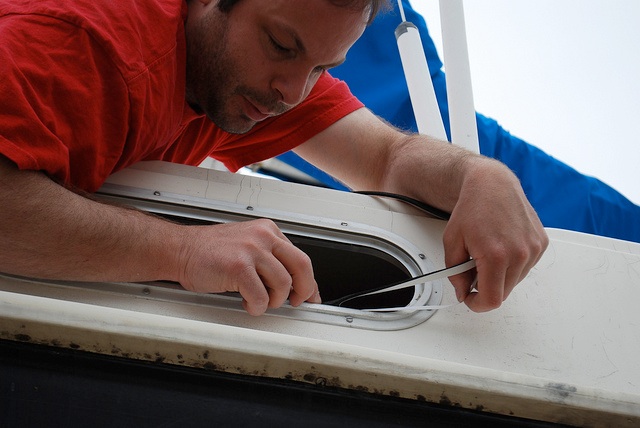
Replacing the Tanzer's Port Hole Windows
It was time to replace the old windows. These frosted windows needed to go. We wanted a bit more light inside, so opted for the smoke colored plexiglass as these would allow for privacy as well as letting in much more light.
The old windows
Removal Instructions:
Pull out the old outer seal... Just use a screw driver and pull out the old seal at the seam. They come out real easy 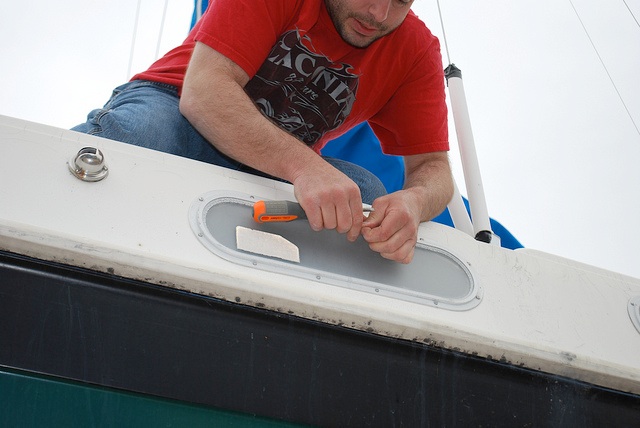
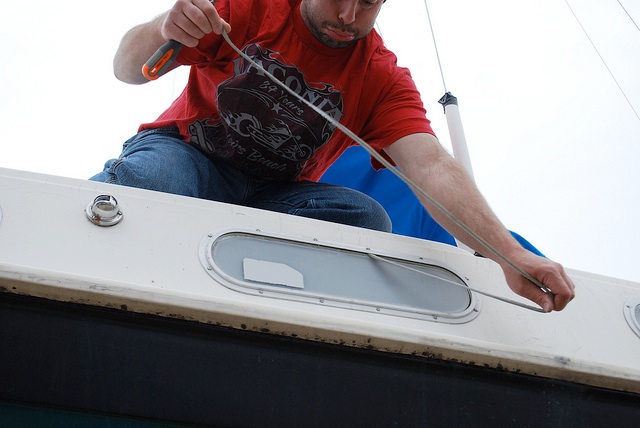
Pry out the old window.... 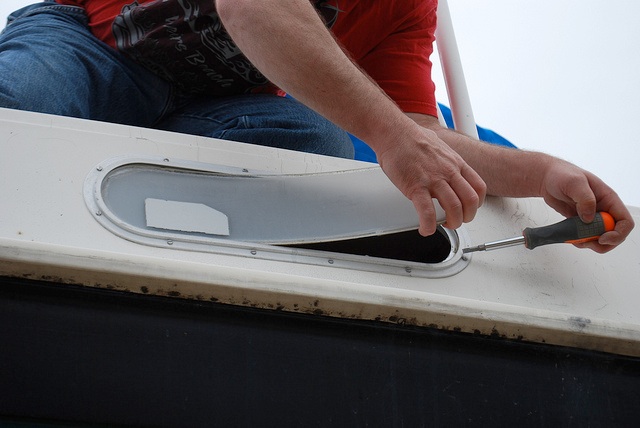
Scrape off the old inner seal. It was junk and really glued in there. It came out in pieces... Make sure you clean up everything well... Use rubbing alcohol to clean the metal area up before you put on the new inner seal.
Carefully peel the backing of the new inner seal and attach. Cut it so it slightly over laps. These seals will shrink over time, so having some extra helps.
Now, (I'm out of photos for this part), you'll need an extra person to help... This is where I would hold the window up against the frame - in the middle of the frame as best as possible. You then take the outer seal... lube up the seal with rubbing alcohol. Just wet a towel and rub the seal with rubbing alcohol, it will make the seal slide in much much easier and will quickly just dry after you are done.
Now same thing here... Run the seal all the way around, when you get to the end, make sure you give yourself an 1/8 inch overlap or so... Put the seams together and work backwards around the porthole frame to push the extra rubber seal you now have into the frame. It will work. This will give you some extra for rubber shrinkage.
And voila!!
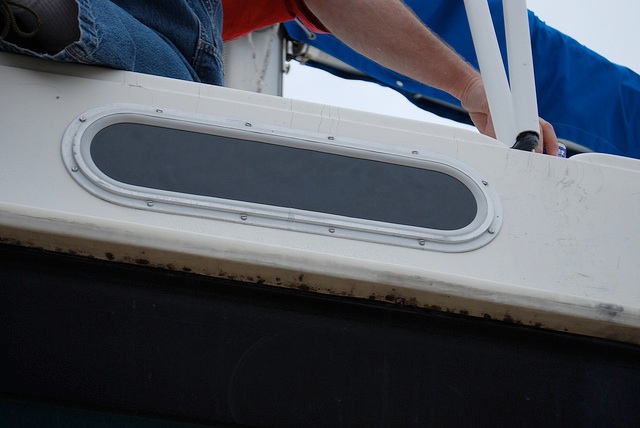
I think we did all 8 in a little over an hour. We had it down pat by the last 4.
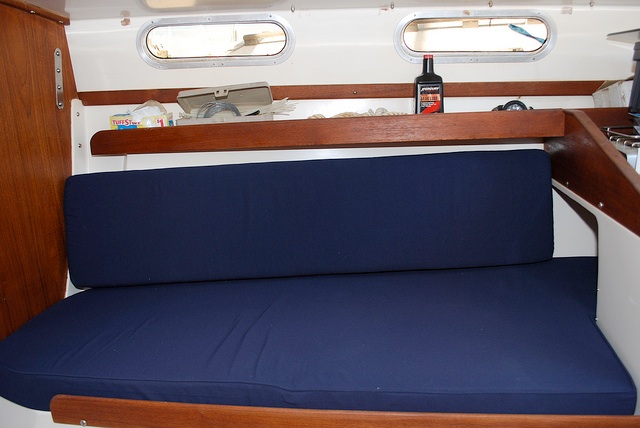
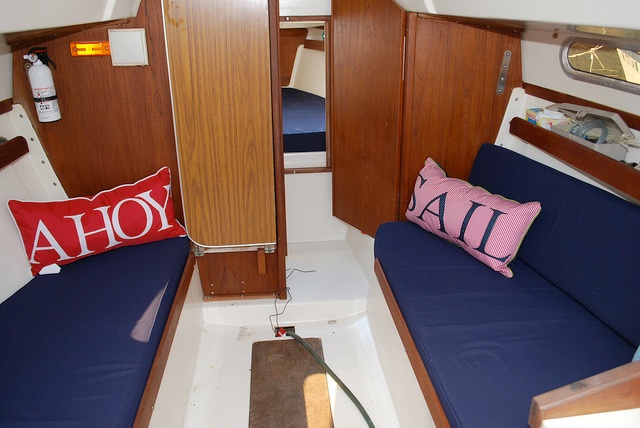
Updating the Interior - New Cushions
July 24th, 2011
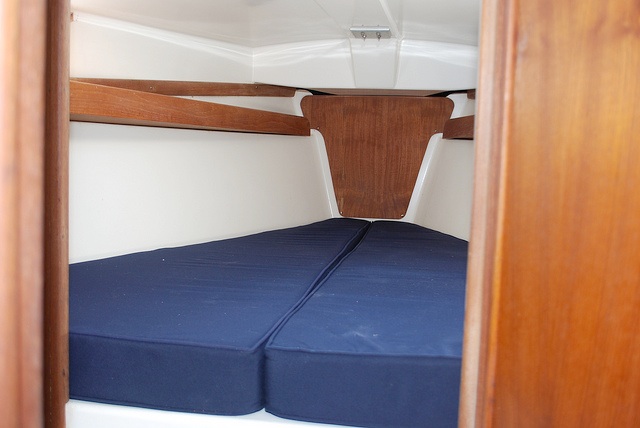
When I purchased the boat, it didn't come with any cushions. This was a must have for me. A sailboat just doesn't feel "homey" if it doesn't have cushions for you to rest your butt on, or sleep on. I found someone that would make cushions and I made full size templates for him. I also had him to the "backs" of the cushions for you to rest up against. There was one flaw, the port side settee has a storage rack above it and a brace comes down for that rack. If the cushion backs do not line up perfectly with this, you'll run into an issue. Mine did not line up. It was off by an inch or so. This just means on cushion gets "bunched" up a bit more than it should. It's definitely not a deal breaker, and most people wouldn't even notice this. But I wanted to mention this so other folks would take note.
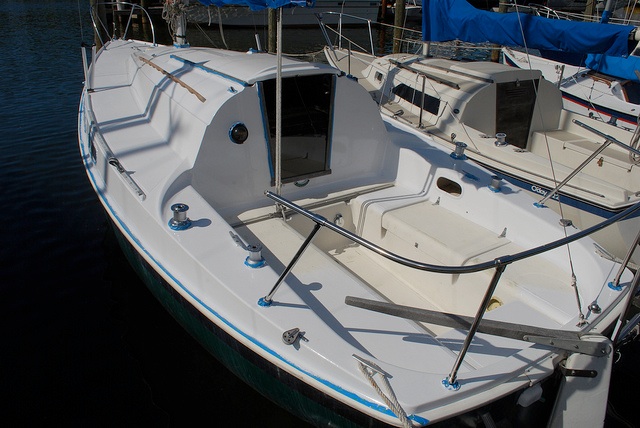
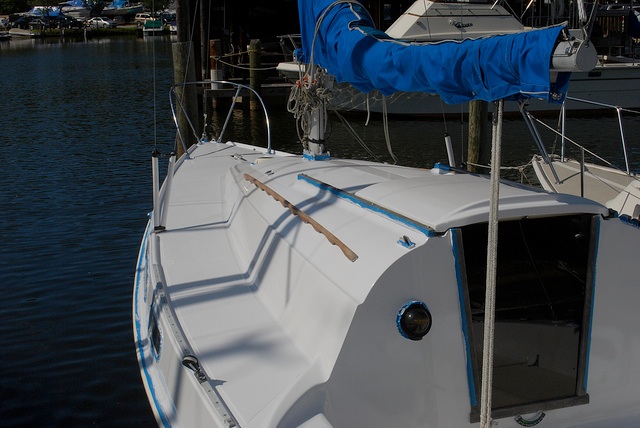
Painting the Boat!!
July 24th, 2011
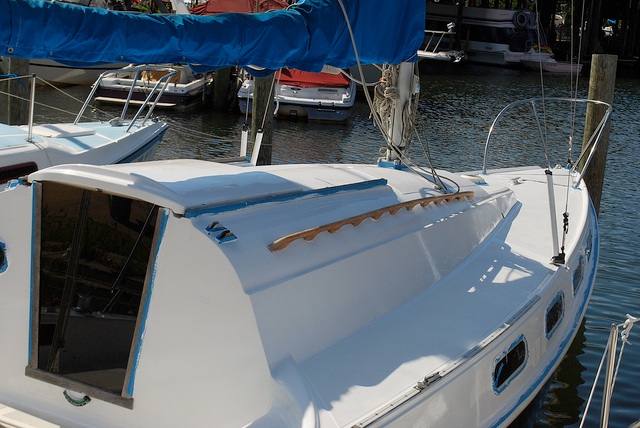
It was time for the yellow dinge and hue of the old paint to go. I hit the marina store and picked up a few cans of the semi-gloss white marine paint. The brand was Pettit. The hardest part was taping off the deck, windows, etc. That took a LOT longer than I expected. After a thorough cleaning of the boat... We sanded and roughed up the old topside and then used alcohol to clean off any remaining residue. We only bought two cans to begin with, but ended up needing three. I purcahsed a forth to have on hand for touchups and any missed spots.
You can see the difference between the old and new paint in this photo... This is prior to the cockpit being painted.
New Motor and Finishing the Interior
October 1st, 2011
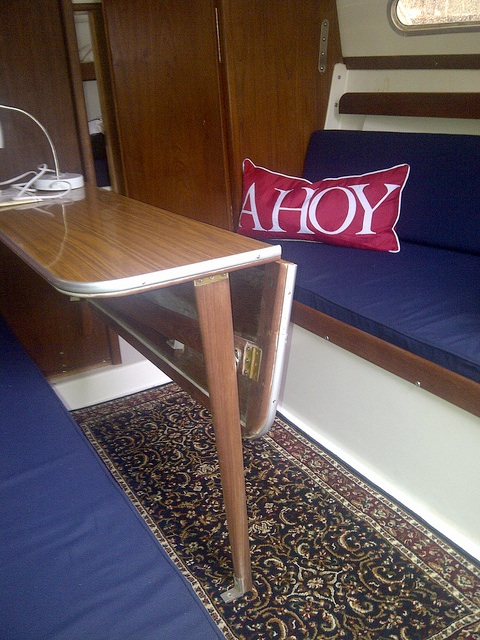
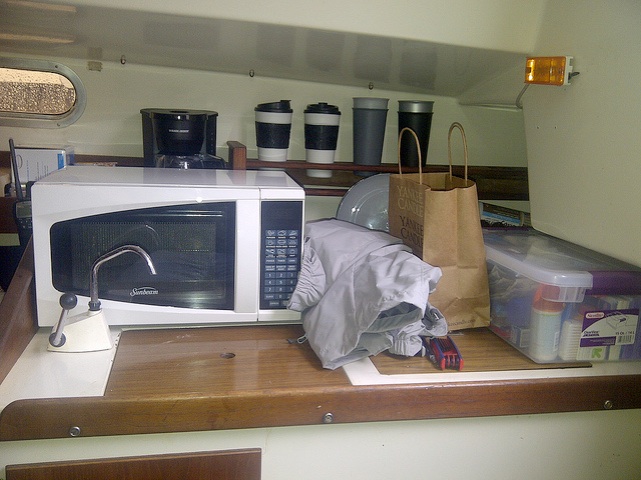
After giving the boat a much needed exterior scrub today, I decided to put some finishing touches on the interior. Yes... Yes... That is a oriental rug on the floor. Perfect size and fit. Hurricane Irene came through our area a month earlier, and despite all the rain, very little came inside. I ran the pump and decided it was safe to put the rug down.
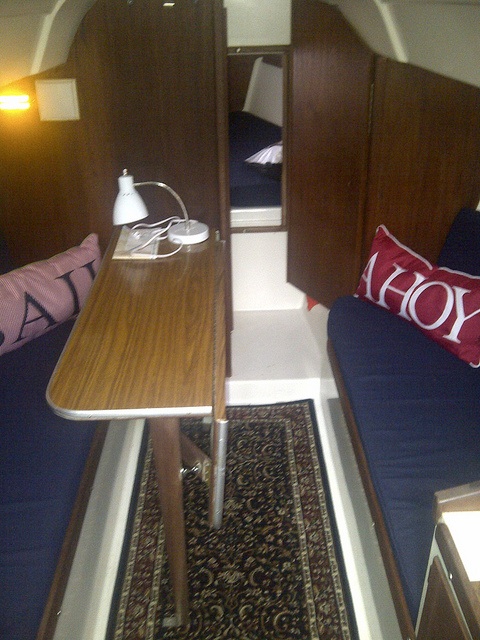
Next I removed the alcohol stove. While it's old and nostolgic, there just wasn't a need to have it on the boat. If I was going to be doing any cooking at all it would be when I was attached to shore. Since my boat is on a lake, and lake rules state I can't anchor out overnight, I'll be at my dock in the Marina when I'm not cruising. So I replaced the old stove with a microwave. The microwave is the perfect size and wattage. Behind it you can also see a coffee pot. Just a small 4 cup one, but none-the-less coffee for those early mornings when my daughter insists we hurry up to go fishing because "the fish are up", as she puts it.